Quantcast
Channel: Suzy Clarke Make-up Artist
Viewing all 37 articles
Browse latest View live

Article 4

$
0
0
Hi everyone, hope you've all had a lovely weekend.

Todays step by step tutorial is on a winged gold, brown smokey eye.
Below is a quick step by step of how I created these eyes.

Products Used

Anastasia Beverly Hills Dipbrow: Auburn 
Illamasqua Skinbase: 7.5
Anastasia Beverly Hills Eyeshadow: Amrezy Palette - Morocco & Glisten
Illamasqua Pigment: Incite 
Illamasqua Prescion Gel Liner: Infinity
Mac Eyeshadow: Swiss Chocolate
Mac Paintpot: Soft Ochre
Ardell Eyelashes: Demi Wispies
Red Cherry Eyelashes: 747m 
Duo Lash Glue
Maybelline Falsies Mascara

Start

 First off I applied the paint pot all over my eyelid. This is to mask any blemishes on my eyelids like veins and redness and also to act as a base primer to hold the eyeshadows on. For this you can use your concealer or foundation if you don't have any eye primers. I also applied the auburn dipbrow onto my brows to thicken up my shape and fill in any gaps where my hairs are sparse. To do this I used an angled brush and lightly feathered the brows on my brows.
To start off the eyeshadow, I applied swiss chocolate in a V shape, winging out the eyeshadow then bringing it back through the socket. I did this to mark out where I wanted the eyeshadow as I knew I wanted to wing the eyes out. If you have far set eyes and don't want to create a winged eye, just keep the shadow in line with the end of your eyes.
Using a blending brush, I applied a small amount of Morocco eyeshadow from the Amrezy palette and blended through the socket into the brown eyeshadow I previously applied. The trick is to keep blending until it all looks seamless, you don't want any harsh lines so make sure that you use a little bit of shadow at a time as applying too much shadow can cause a mess.
I then applied the gold pigment by Illamasqua all over the eyelid, trying to keep the gold shadow under the socket line so the shape is still neat. You can use any gold eyeshadow/pigment you prefer.
Using a fine brush I bought from an art shop for under £5, I applied the Illamasqua gel liner along my lashline. I followed the shape I created with the eyeshadows and winged it out to a point. My eyelids are quite wrinkly so a good tip for applying eyeliner is to hold the skin around your eyes upwards and tightly so the liner can go on easier.
I then started to create a point at the inner corner of my eye to really accentuate the cat eye look. This type of liner shape is perfect to create that arabic makeup look so you could try incorporating this in another heavier look. This shape eyeliner is really difficult to create if you don't have a fine enough brush so I would recommend going to an art shop to find a cheap fine brush or buying a makeup brush that is thin enough. I also applied the mascara to the lashes which is something I would always say you should do before applying any false lashes.
Under the eyes, I applied the swiss chocolate eyeshadow and blended the edges with the morocco shadow. I added a touch of Glisten from the Amrezy palette just at the inner corner of the eyes. I then applied the Ardell lashes first then the Red Cherry lashes on top to create a lovely feather effect.

The finished look complete with my simple sculpt using Illamasqua Skinbase foundation and a dark pink lip using my mac lip pencils.


I hope you all found this step by step tutorial helpful. You can tweak this look to suit you and your occasion. If your going to an Asian wedding, this look would be perfect, you could use the same technique but with different colours. You could do a subtle version of this look by not applying such a strong liner, it all depends on your personal preference.

Thanks for looking

Suzy x

Article 3

$
0
0
Welcome back to my blog....

This step by step tutorial is on a dark smokey eye with blue hints to really make the most of my eye colour which a bluey green colour.


Products Used

Anastasia Beverly Hills Dipbrow: Auburn
Mac Paintpot: Soft Ochre
Anastasia Beverly Hills Eyeshadow: LBD (Amrezy Palette) 
Mac Eyeshadow: Contrast & Deep Truth 
                                             Nars Eyeshadow: Dalliance (Inoubliable Coup d'Oeil Palette)
Mac Fluidline Eye Pencil: Deep Blue Sea
Ardell Eyelashes: Demi Wispies
Red Cherry Lashes: 747m
Illamasqua Skinbase: 8
Mac Studio Fix Concealer: NW20 & NW15

Start

I started off by applying mac paint pot all over my eyes using my finger to really blend it in. I then applied the NW15 concealer right under my brows to add a strong highlight under the eyebrow. I filled in my brows using my Anastasia Beverly Hills Dipbrow by brushing the product through my brows and filling in gaps and adding more thickness. 

I applied the ABH shadow in LBD all over my eyelid. When doing this, try to apply the shadow in the shape you would like that dark eyeshadow to appear, if you just whack it on anywhere, when it comes to the blending you will really struggle. 
Now for the blending, start with a clean blending brush and gently blend the edges of the shadow. 
Taking a fresh blending brush, I applied the Nars shadow to the edges of the dark shadow to blend the black shadow outwards. 
I then applied a wash of Mac's Contrast eyeshadow on top of the black eyeshadow to give a blue hue to the look.
I then applied the fluidline in Deep Blue Sea along my waterline to give a pop of blue.

To complete the eyes, I applied my false eyelashes and added a slick of mascara to both my top and bottom lashes. To change up the look, I applied Mac eyeshadow in Deep Truth along my lower lashline to make the blue really pop.


Finished Look

I hope this tutorial was helpful to you, you can use this technique but use a range of different colours depending on your preference. 
I'll be creating more YouTube tutorials soon so please keep a look out for those. 

Thanks for looking. 

Suzy x

Article 2

$
0
0
Happy Monday Everyone....

Just wanted to let my readers know I've got some exciting projects lined up for this year.
Anyone wanting to learn makeup from me, please stay tuned as I'm going to be revealing some exciting news in the coming weeks....just think affordable makeup courses :-)

Suzy x

Article 1

$
0
0
Happy Saturday Everyone...

I've been a bit obsessed with the winged eyeliner recently, it completely transforms the eye shape into cat eyes which I love! I wanted to do this look using one of my favourite Illamasqua pigments (Fervent) that I haven't used for a while but when I use it, I fall in love with it all over again.

Heres how I created this look.....

Products Used

Mac Studio Finish Concealor- NC20
Anastasia Beverly Hills Dipbrow- Auburn
Mac Eyeshadow- Fig 1
Anastasia Beverly Hills Amrezy Pallette- Deep Plum
Mac Fix+
Illamasqua Pure Pigment- Fervent
Illamasqua Precision Gel Liner
Ardell Eyelashes- Demi Wispies
Red Cherry Eyelashes- 747m 
Duo Eyelash Glue
Illamasqua Skinbase-7.5
Mac Minerlize Skinfinish Powder- Light 
Mac Lip Pencil- Vino & Beet.
Illamasqua Pencil- 


Start
 To start off, I applied the concealor all over my eyelids up to the brows to conceal any redness, blemishes or veins and give myself a good base to work from. I then powdered the eye area with the skinfinish to make it easier to blend my eyeshadows into. I applied my dipbrow through my brows and fill in any gaps and thicken them up a bit.
For the eyeshadow, I applied Fig 1 shadow in a V shape from the edge of my eye outwards then back through my socket. This V helps create the shape of the winged liner you apply at a later step. 
 Using a clean blending brush, I buffed the edge of the eyeshadow outwards and upwards for a blended effect.
Then I went over the shape with a darker shade, for this I used Anastasia Beverly Hills shadow in Deep Plum, which is a dark plum shade.
 I blended in a little more of the Fig 1 eyeshadow into the socket and upwards as the colour wasn't as vibrant as I wanted.
I then sprayed mac fix+ onto a flat brush and dipped it into the Fervent pigment. I used fix+ to make the pigment wet and more opaque when applying it. You can use this pigment to dust on but I wanted a strong wash of this colour on the eyelids. I applied this just on my eyelid, under my socketline.
Using a super fine brush, I applied the Illamasqua gel liner along my lash line and slightly winged it out.
 I applied the liner thicker towards the edge of my eyes to really accentuate the cat eye shape. At the inner corner of the eye, I create a slight point using small strokes and then applied it along my lashline.

To finish the eyes off, I applied both sets of eyelashes and blended some fig 1 shadow under my lower lashline with deep plum applied right at the lashes.


I hope you all liked my quick step by step makeup tutorial. If there's any looks you'd like me to recreate, please let me know.

Suzy xx

Nars Sheer Glow

$
0
0
As promised a while ago, heres my review of the Nars Sheer Glow Foundation...


This is a foundation mentioned by so many as a holy grail foundation but I hadn't had the chance to try it, crazy I know being a Makeup Artist but when you find a product your happy with, sometimes it's easy to just buy that same one every time BUT I finally tried it... eventually :-)

The Verdict.... I love it!

The coverage is sheer but buildable which is perfect to show off your skin but cover all the blotches, blemishes you want to hide.

I used this on myself first and found the staying power was pretty good, the more the day went on, the more the foundation gelled with my skin. It obviously doesn't have the staying power of heavy duty foundations like double wear but for a sheer foundation I'd say it was pretty good. My skin is quite red, especially around my cheeks, I have scarring and red marks but this foundation did well to mask them. I needed extra coverage on the super red parts but this did a really nice job on my skin.

The second time I used it was on a wedding in Portugal in the high temperatures of September. This was the real test, to see if the foundation could hold up well on hot skin and have staying power to last all day. All the bridal party had beautiful skin so this was the perfect choice to let their skin shine through. Did it hold out? It did! I was super happy, I stayed for the whole wedding and night part (leaving at 2am) so I had the chance to really see how the makeup held.

After seeing sheer glow hold out on a hot day I would really recommend this product.
Who wouldn't I recommend this to? People who love a matte finish, a heavy coverage or someone who has particularly oily skin.

Recommend: 100%
Suitable for: Normal or Dry Skin
Unsuitable for : Oily Skin
Finish: Dewy Natural skin like

I'll attach pictures of before and afters for you to really see how it looks (bare with me:)

Happy New Year

$
0
0
Happy New Year everyone!!
I hope you have all had a wonderful 2015

Welcome back to my blog... I've been absent for quite a while because I've been too busy working, I haven't had any time to write up BUT I'm officially back!
It's one of my New Years Resolutions (I do stick to my resolutions except the usual losing 10,000 pounds by summer ones) to blog more often so be prepared for blogs every week :-)

I'll be doing lots of product reviews, my honest opinion because I know makeup can be expensive so I don't want anyone buying products that aren't any good. I'll be doing some more makeup tutorials, with advice targeted at different aspects of makeup, skin care & facial features. I'll post behind the scenes photos from any of the shoots I'm on and list product details and lots more makeupy related things.

Stay tuned and if there's anything in particular you'd like me to do, please let me know.

Suzy x

Top 5 Favourite Makeup Artists

$
0
0
I wanted to start off the year discussing my top 5 Makeup Artists.
These are MUAs who inspire me and motivate me to keep pushing my work.

There are the big names that everyone already knows well like Pat Mcgrath, Charlotte Tilbury & Val Garland to name a few but there are some Makeup Artists that I absolutely love and I feel their names aren't that well known unless your in the industry or an instagram stalker like me.

These MUAs are....

1. James Molloy


James is one of my all time favorite makeup artists because he can do all styles of makeup in an amaing style. He's a true artist that creates beautifuly creative and colourful makeup along with clean lines and amazing skin. He is definitely the one Makeup artist I aspire to.

www.james-molloy.co.uk
www.mykitco.co.uk
instagram: jamesmolloymakeupartist

2. Hung Vanngo

Hung creates the most beautiful makeup, he really captures the beauty in every face he makes up. I can instantly tell when he's done the makeup on a model by his signature looks. His skin and eyes are my favourite looks of his, he creates the most beautiful subtle cat eyes and flawless but real looking skin.

www.hungvanngo.com
instagram: hungvanngo

3. Alex Box

Alex is one of the greatest artists of my time, and it just happens that her medium is mostly makeup. All her work is inspirational, its always art on the face created using makeup, science and technology.... it sounds weird but once you look at her portfolio of work, you will see exactly what I mean.

www.thealexbox.com
instagram: TheAlexBox

4. Marco Antonio

Marco's work is amazing, its beautiful yet creative all in one. His portfolio is flawless, for inspiration I would 100% recommend looking at his work.

www.marcomakeup.com
instagram: marcoantoniolondon

5. Isamaya Ffrench

Isamaya is another makeup artist who's background started with art. Her work is weird and wonderful, tackling issues in the world and just being fun. She's definitely a massive inspiration to me, to delve further with makeup, not just to make people look pretty but really think about issues and show that through my work.

www.isamayaffrench.com
instagram: isamyayffrench


I have so many more favourites that I just absolutely love like Adam Burrell, Lotstar, Nikki Makeup, Violet Zeng plus lots more but I can't name them all because this post will be 100 pages long.
Check them all out and see what you think about my chosen MUAs, I'm sure everyone has their own top 5 list, whats yours?


Favourite Blog

$
0
0
Hey Guys...

So I just wanted to share an amazing blog I've come across... It's so good, I have to spread the word....

www.mascarawars.com

If your a Makeup Artist, interested in makeup, or just want to read a good blog then head over to Mascara Wars! It's filled with fantastic tips, Artist interviews and generally exciting makeupy things. It's written by Makeup Artist Lucy Gibson originally from Manchester (where I'm from) which fills me with happiness and she's also an amazing Makeup Artist too.

Check it out and let me know what you think :-)

Suzy xx


SNAPCHAT

$
0
0
So social media is taking over and I need to keep up with these ever evolving times which is why I'm jumping on the bandwagon that is Snapchat. I'm 'snapping' my life as a Makeup Artist, behind the scenes on photoshoots, showing my makeup looks and a few quick tutorials in there for good measure.
If your interested then you can add me using my username ... SuzyClarkeMUA


Photo Editing on Social Media

$
0
0
Hi everyone!!!

Right so photo editing... this subject has been on my mind a lot recently, why?? Due to seeing so many pictures of people editing their photos... How do I know this? I can obviously see what's been edited due to crazily smooth skin and ever changing facial features.

Left: Unedited Original           Right: Over edited Photo

Let me state that I have absolutely no problem with this what so ever, if anyone wants to edit their pictures then that's personal preference, everyone can do what makes them happy! Zapping away a little spot thats ruining your photo makes life so much easier. What I want to talk about is how these unrealistic photos of people (with their perfectly edited faces and bodies) all over the social media sites can make other people feel when comparing themselves. Especially young girls who might have puppy fat, or acne or some other part of them selves which makes them self conscious. These impressionable young girls might already feel inadequate compared to the blessed by the gods models in magazines/instagram (I know I did when I was in my teens) and now every other person is becoming one of these unattainable people by editing their photos.

I just want to say... DON'T COMPARE YOURSELF EVER!!

Working with models I know that yes they are naturally beautiful and work hard on their bodies (it's their job and if they didn't they wouldn't be booked) but sometimes they are also photoshopped to give them thicker hair and smooth skin and any lumps and bumps zapped away with the click of a mouse. So you never know what's real or not so by comparing yourself to these people, you are comparing yourself to something that might not real and you'll never be happy.

Everyone gets spots, they might carry a bit of extra weight they don't want, have thin lips, bump in the nose etc, sooo many different insecurities! That's what makes us all different and human, not everyone finds the same things attractive so lets all try to love ourselves as we are and not compare ourselves to anyone.

Suzy x


Article 0

$
0
0
Hi Guys!

So I've decided to concentrate a whole lot more on my blog, I always neglect it due to being so busy but I'm going to dedicate my spare time to updating this frequently. If there's anything in particular that you'd like me to post then please let me know. I'm going to be giving honest reviews on products, I'll test them on myself as well as on my clients to get a good feel of all the products. Step by step tutorials and also I'll be posting makeup trends that are in fashion/social media and what makeup celebrities are wearing.
Keep checking back for my posts :-)

Suzy x

Sleek Makeup

$
0
0


Sleek is one of my favourite brands out there and what's even better is it's one of the most affordable ones too. As a Makeup Artist I use a range of all brands Illamasqua, MAC, Nars, Anastasia Beverly Hills, Laura Mercier, Armani and they all seem to be pretty high end and expensive but Sleek is one of the brands I regularly use and will always continue to go back to regardless of the price.
I want to show you guys what my 3 favourite Sleek products are, the ones that I can't live without....

Contour Kits

My ultimate favourite Sleek product and the main product I use for highlighting and contouring is the contour kits they have. I have one in each of the 3 shades, Light, Medium & Dark. I find that having these 3 contour shades usually work for every skin tone I've come across. There are 2 types of these contour kits, you can get just the highlight and contour shades or there's the kits with an additional blush or bronzer shade too called Face Form. Both are fantastic and I'd recommend to everyone.

Contour Kit 


Contour Kit with additional blusher ( Face Form)

Model Roxy Horner.
Here I used the light contour kit on my model Roxy. To really bring out her cheekbones, I applied the contour shade along her cheekbone to really enhance that natural shadow and then I popped a dusting of highlighter along the high point of her cheekbone and down the centre of her nose. 
I've tried using other contour products but always stock this one in my kit as it's my go to for every model. They've just brought out some new cream contour palettes so I'm obviously going to have to purchase these and test them out:-)

Price £6.49/£10 

Eyeshadow Palettes

The Sleek eyeshadow palettes are amazing value for money and the range of shades they have in each palette is unreal. The palettes range from neutral to bright acid colours and they have both matte and shimmer textures. I mainly use MAC eyeshadows but I have a few of these palettes in my kit incase I need a pop of exciting colour or a different texture. I would 100% recommend purchasing some of these palettes as they are super affordable and easy to use. 
The All Night palette is a great neutral palette which I love and think it's a great choice for anyone with light to medium skin tone. I would always suggest having the Acid palette because you never know when you'll need some bright colours and you definitely get them with this one. Or there's a massive range of other palettes to choose from if your after some colour like the Orginial palette. 
All Night Sleek Palette
Acid Palette

Eyeshadows from Calm Before The Storm Palette 


Price £7.99


Lip 4 Lipstick Palettes

These palettes are amazing, especially for my kit. I'm not sure how easy they are to use in your normal day to day life but as a makeup artist these are a godsend. They come in 6 different palettes but the one I mainly use is the Ballet which is a range of 4 different nude/pinks. It comes with a mini brush that slots into it perfectly but I always use art brushes for lips which you can get from any art shop for around £1. 

Ballet Lip Palette

Model Lilly Aspinall

I used this Ballet palette on my model Lilly to get a nice matte natural lip colour by mixing a few of the shades together. They've got reds, plums, pinks and oranges so I'd recommend if your experimental with lip colours or a bit indecisive like me and like to mix every colour under the sun. 

Price £8.99 


So there's my 3 fave products from Sleek, let me know if you want to know more about these products or tell which your fave products are. 

Suzy xx


Makeup Of The Day

$
0
0

I'm constantly working on different models everyday and they post selfies of themselves on instagram/twitter etc so instead of reposting on instagram, I'm going to post them on here and give detailed blogs on how I created each makeup and product breakdowns.

Model Selfie-Cindy 
Here I have the beautiful Cindy Marichal ...... 
The look was glam esq but not too overdone and heres how I created this look.

Product List

Embroylisse Moisturiser
Illamasqua Skinbase Foundation
Mac Studio Finish Concealer
Illamasqua Loose Powder- 010
Sleek Contour Kit - Dark
Anastasia Beverly Hills Dipbrow- Dark Brown 
Illamasqua Brow & Lash Gel
Maybelline Gel Liner - Black
Mac Eye Pencil - Teddy
Mac Eyeshadows - Antiqued & Embark
Maybelline Faslies Mascara 
Red Cherry Lashes - 43
Mac Lip Pencil - Chestnut
Mac Lipstick - Velvet Teddy 
MUA Lipgloss


1. First I prepped Cindy's skin with Embroylisse to really hydrate and give a good base to start.

2. I then buffed in the Illamasqua Skinbase foundation all over her face using a Real Techniques buffing brush.

3. I applied a base over her eyes using the Mac Studio Finish Concealer and my fingers to really press it into the eye area and to make sure I didn't miss any bits. 

4. I buffed Mac Antiqued Eyeshadow over her eyelid and just a tiny bit over her socket using a Mac 224 brush. 

5. Using a Mac 217 brush I blended some Mac Embark Eyeshadow into the outer corner of the eyes.

6. Using a super thin art brush, I applied a thin line of Maybelline gel liner along the top lash line and winged it out slightly. 

7. I then applied the Red Cherry Lashes using Duo lash glue. I applied a thin layer of the glue to the lash band, waited a minute for it to go slightly tacky then placed the lash onto the lashline and press for it to hold into place. 

8. Under the eye, I applied Mac Teddy Eye pencil along the waterline and blended out using the 217 brush from before which still had some Embark eyeshadow on it. 

9. To complete the eyes, I applied Maybelline Falsies Mascara to both upper and lower lashes. 

10. To finish the face, I blended some Mac Studio Finish Concealer under the eye using an Illamasqua Blending Brush to cover any under eye imperfections. 

11. I then applied Illamasqua Loose Powder to the whole face to really lock in all that foundation which easily slips under hot photography lights. 

12. To do my simple sculpt (casual contour & highlight) I used a Crown Angle Contour brush to apply the dark contour shade from the Sleek Contour Kit along the cheekbone and then I dusted the highlighter shade along the top of the cheekbones. 

13. For the lips, I lined the edge with the Mac Lip Pencil in Chestnut then blended the liner in using Mac Velvet Teddy Liptick using an art brush. Then I applied the MUA Lipgloss straight over the top.

14. Lastly to finish the whole look, I combed the brows through using a mascara wand, then using an Illamasqua Angle Brush, I brushed the Anastasia Beverly Hills Diprow through her brows following the natural shape then finished them with the Illamasqua Brow& Lash Gel

Thats how I created Cindy's Makeup. If you've got any questions please leave a comment :-)

Suzy x 


Beauty Bay Shoot

$
0
0

Last week I worked with BeautyBay.com, demonstrating some of the products they sell on their site.
I used products from Natasha Denona, Anastasia Beverly Hills, Stila Cosmetics, Edward Bess & Motives Cosmetics.

My fave stand out products from the shoot are:

Edward Bess - Flawless Illusion Transforming Full Coverage Foundation 

This foundation was a dream to apply, it took me literally 5 seconds to buff it into the skin using a Real Techniques buffing brush. It's a cream to powder formulation which makes application super quick and powdering afterwards isn't a must unless you have super oily skin. It only comes in 5 shades, (Fair, Light, Medium, Tan & Deep) which makes it so much easier to choose which shade you need to get. I 100% recommend this foundation so it's going straight into my kit.


Natasha Denona - Eyeshadow Palette 28 Green Brown

This is just the most beautiful eyeshadow palette, the range of colours and finishes of the eyeshadows is just amazing. I only had the opportunity to use 2 of the shadows but I swatched quite a lot of them and was blown away by the pigment of each shade. You could create unlimited amounts of eye looks with this palette, shimmy glittery gorgeousness , dark matte & smokey or pops of colour. I need this is my kit but I'm gonna to have to save for a little bit first.


Anastasia Beverly Hills - That Glow Kit

This is a highlighter palette that has 4 different shades of shimmery glowfullness. I'm a huge fan of highlighter, whether it's a powder, cream, gel, liquid, just anything shiny, glowy and dewy so this product was right up my street. Each of the powders is a different shade, ranging from light to medium so can suit a good range of skin tones. This highlighter palette can be used wet or dry, it's amazing dry but for that extra ping on the skin, spraying a bit of water on your brush then applying this highlighter is a dream. It's super easy to apply and blend into the skin so if your on the lookout for a highlighter definitely give this a go.


If your looking for some cool brands that you can't get in standard shops in the UK then I'd definitely recommend checking out Beauty Bay, they stock some amazing makeup and beauty brands and I'm always on the website looking for the new and upcoming brands.

Keep a lookout for the videos I shot with them coming soon on the site.

Suzy x


Model: Stacey Hannant at Industry Models 
Location: Northen Quarter Studio
Production company: Soup Co 

www.BeautyBay.com 

Article 0

$
0
0

Snapchat Tutorial 


As I mentioned on a previous post, I've started doing step by step tutorials of a wide range of different makeup looks, giving tips and tricks along with product breakdowns. Here is one of the first videos I managed to save in time (Snapchat deletes the videos after 24hours), showing a glowy lashey look similar to the makeup created by Patrick Ta and Makeup by Ariel on the Kardashians.

Let me know what you think of my videos and if there's any particular looks you'd like me to create.


Suzy x

Snapchat: Suzyclarkemua 

Article 0

$
0
0

Basic Wearable Makeup 


So I always do posts on quite heavy or a full face of makeup but I never really think about people who have no idea where to start and want to look super natural so I'm going to run through the basics to give you an idea of where to start. If your completely clued up then maybe skip this post as I'm going right down to the bare basics. 


Prep your skin 

The first thing you need to do whenever your going to apply makeup is prep your skin. This might sound like hard work to the everyday person who doesn't wear a lot of makeup or have the time in the morning (I know I'd rather sleep then get up early to do makeup) but by prepping the skin, I mean something super easy that fits into your everyday routine. Prepping is basically just cleansing and moisturising your skin and thats it... Cleansing is just washing your face from any grease, dirt or residue on your skin and what you use to do this is entirely up to your budget.  


A few products I'd recommend are:

Micellar Water
This is a fantastic cleanser for sensitive skin, I treat everyones skin as sensitive as using harsh chemicals can upset even normal skin so all my skincare is for sensitive. This is a no rinse cleanser so all you have to do is pop some on a cotton pad and clean over your skin and your done, super easy and quick. There are a few different brands that can suit all budgets.

Bioderma Sensibio Micellar Water- £10+ 250ml


Garnier Micellar Cleansing Water - £4+ 400ml 


Simple Kind To Skin Micellar Water - £4+ 200ml 

There are so many other cleansers you can use depending on your preference, some people like to actually wash their face with a cleanser and water, some like to use a cloth, the list goes on and on but as long as your cleaning your face of any residue off your face then you are making a lovely base to work on.

Moisturiser
Once you've cleansed your face it should be squeaky clean and ready to moisturise. Moisturing is so important to prevent your skin from ageing, protecting your skin from weather conditions such as sun, wind etc and lastly to help your makeup glide on so much better. Foundation doesn't work well with dry skin, it needs soft skin to glide upon. Choosing a moisturiser completely depends on your skin as there are different types. You need to choose a moisturiser that suits you, if you have oily, dry, combination or normal, you need to find one that will work for your skin.
There are hundreds of moisturisers to choose from, I know I'm still looking for my perfect moisturiser but heres a few I recommend.


Basic Makeup 

Once you've prepped your skin your ready to apply makeup. What makeup you apply is completely personal preference, it's down to what your comfortable with and how much you want to wear, that could be no makeup makeup or natural glam. 
The basics you need are..... 

Base coverage
Your base makeup or in other words, the makeup you use for your skin is a vast world of products. There's foundations & tinted moisturisers that come in liquid, creams, powders, gels, you name it and it's probably out there so choosing what to use is mind blowing. If your going for the bare minimum I would reccomened using a tinted moisturiser in a liquid form to give a light natural coverage but still let the skin shine through. If you've got lovely skin already then I would skip this step alltogether. 

Concealer
Concealer is used to cover up blemishes, spots and under eye bags and if your unhappy with your skin this is probably the most important product to use. Choosing which concealer to use is completely personal preference but the main thing is to choose one that is exactly the right match for your skin tone, if you need help choosing you can always ask someone who works on a counter or in a cosmetic shop. Apply concealer to the underneath of your eyes and any blemishes using your finger, a brush or a beauty sponge to blend it in. Concealer should look super natural and shouldn't be detectable so if you can see the product obviously, then your not using the right one. 
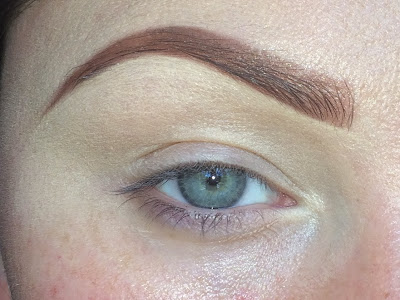
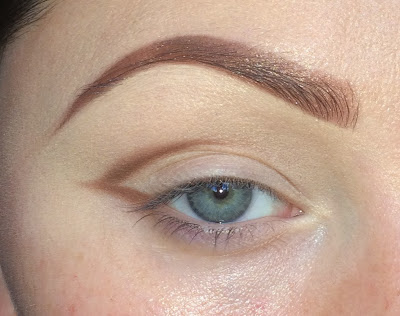
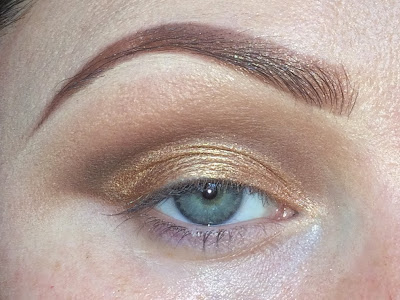
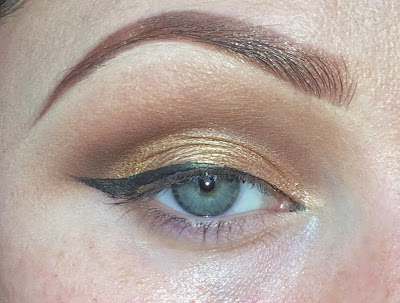
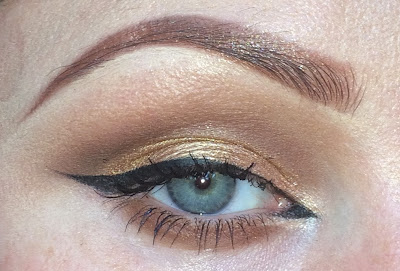
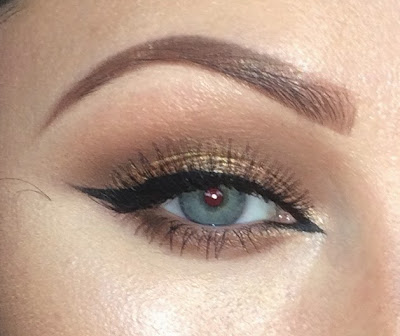
Eyes
Eyes are the windows to the soul and my favourite part of the face to apply makeup to. If your being super natural, the one piece of advice I would give is to curl your lashes, it takes 30 seconds but completely transforms your eyes. A swipe of either clear, brown or black mascara works a treat in giving the eyes that little something extra. A subtle swish of brown eyeshadow or eyeliner along the lashline smudged gives the lashes an extra bit of oophmf without looking like your wearing lots of makeup. 

Bronzer/Blusher
These products are used to give life to the face, bronzer for some warmth and blusher for a fresh flushed look. A swish of bronzer across the forehead, cheeks and nose gives that natural suntan look but make sure you apply it super subtlety or it can end up looking like stripes across the face. If your more into the blushed look, add a pop of blush to the apples of the cheeks, use cream blush for a dewy look and powder if you've got oily skin. 

Lips
For lips you can add a quick bit of lip balm or tinted balm if you like wearing colour. 


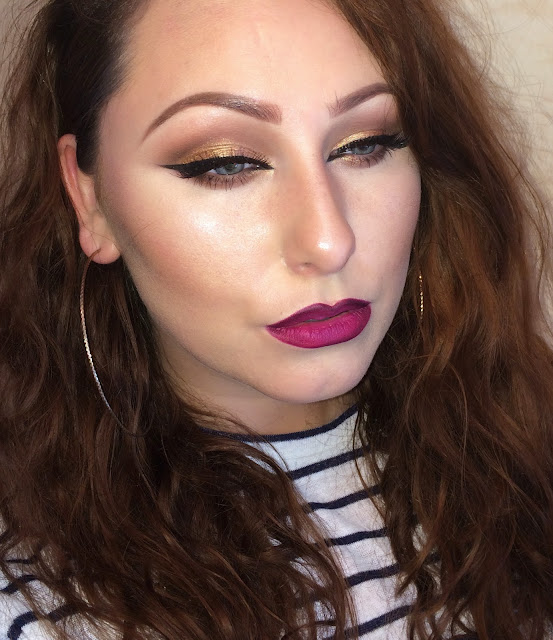
These are some of the simple basics of a natural makeup, I hope this helps in some way for people who are clueless when it comes to makeup. If you have any questions, please ask away. 

Suzy x


Makeup Of The Day

$
0
0


On the beautiful model Louise, I went for dewy but contoured skin, a slight flick and a sutble smokey eye. Heres how I created this look...

Products

Embryolisse Moisturiser
Illamasqua Skin Base Foundation
Nars Creamy Concealer
Sleek Contour Kit
Mac Eyeshadows- Swiss Chocolate & Woodwinked
Anastasia Beverly Hills Dipbrow
Maybelline Gel Liner
Mac Lip Liner
Primark Inidvidual Lashes
Maybeliine Falsies Mascara 

Method

I started by moisturising Louise's skin to hydrate it and get it primed ready for the foundation. If you've got super oily skin always try to go for a moisturiser that combats oily skin otherwise your foundation will slide off your face in an instant. 
I then buffed in the Illamasqua Foundation all over her skin, she has lovely freckles so I made sure that I only applied the foundation where she needed it and let her beautiful freckles shine through. 
I blended Swiss Chocolate eyeshadow all over her lid, this is a medium brown that adds a lovely bit of warmth to the eyes. 
I then pressed Woodwinked eyeshadow just onto the centre of her lids to add a pop a light gold which brightens up the eye.
I added a slight flick to the corners of her eyes to create a slight cat eye. I didn't want to make the line too thick as sometimes this can close the eye up so try to keep that in mind when creating your own eyeliner. 
I added a few individual eyelashes to really open her eyes up and create a lashy look. These Primark lashes I used are my absolute favourite. They are only £3 and you get a range of different lengths in the one pack which I find perfect for the varied natural lash look. I'll be doing a video tutorial on how to use these lashes soon so keep a look out for that. I blended the false lashes into her own by adding the mascara afterwards. 
I applied a small amount of the Nars concealer under her eyes to add some depth to her face and brighten up any dark circles. To finish the skin I applied the contour shade from the Sleek palette to her cheekbones to make those pop on camera and down the sides of her nose to slim it down ever so slightly. Then using the highlighter shade, I added a glow to the tops of her cheekbones, corner of her eyes and down the centre of her nose. 
For her brows, I brushed the hairs up using a clean mascara wand and filled in any gaps using the Anastasia Beverly Hills dip brow and an angled brush. 
To complete the look, I applied Mac Lip Liner in Spice all over her lips and added some lipbalm to keep them from drying out.

For her hair, I scrunched Twisted Sista 30 Second Curl Spray into the ends of her hair to really define those beautiful curls but I can't really take credit for her hair because she sat in my chair with those luscious afro curls to begin with :-) 

Keep a look out for more Makeup of the Days featuring my Model's selfies. 
Thanks for stopping by, I'll try to up my vocabulary for my next posts:-)

Suzy xx


Viewing all 37 articles
Browse latest View live